
When the temperatures soar and your air conditioner (AC) refuses to turn on, it can be incredibly frustrating. Whether it’s a scorching summer day or a sweltering evening, dealing with a malfunctioning AC can disrupt your comfort. But before you panic and call a professional, it’s worth checking a few common issues yourself. In many cases, a simple fix can get your air conditioner up and running again. This guide will walk you through the basic troubleshooting steps to identify and resolve common reasons why your AC might not be turning on.
Step 1: Check the Power Supply
One of the simplest and most common causes of an air conditioner not turning on is a power issue. If your AC isn’t receiving power, it won’t run. Here’s how to check:
- Power Switch: Ensure that the AC is properly plugged in. This may seem obvious, but it’s easy to overlook. Some models have a dedicated power switch, so double-check that it’s turned on.
- Circuit Breaker: Check your home’s circuit breaker or fuse box. Air conditioners consume a lot of power, and sometimes the circuit can trip due to overload or a power surge. If the breaker is off, simply reset it. If it trips again, there may be a more significant electrical issue.
- Wall Outlet: If the AC is plugged in but still doesn’t turn on, try plugging another device (like a lamp or phone charger) into the same outlet to ensure it’s supplying power.
Step 2: Examine the Thermostat Settings
The thermostat is your air conditioner’s brain, so if it’s malfunctioning, your AC may not work properly. Here’s what you should check:
- Temperature Setting: Ensure that the thermostat is set to a temperature lower than the current room temperature. If the temperature is set too high, the AC will not activate. Try lowering the setting by a few degrees.
- Mode: Ensure that the thermostat is set to “cooling” or “AC mode.” If it’s set to “heat” or “fan,” the air conditioner will not engage.
- Battery: Some thermostats are battery-operated. If the batteries are dead, replace them with fresh ones to restore functionality.
- Calibration: If your thermostat is a few degrees off from the actual room temperature, it may prevent the AC from turning on. Consider recalibrating it if necessary, or consult the user manual for specific instructions.
Step 3: Inspect the Air Filter
A clogged or dirty air filter can restrict airflow, causing the air conditioner to overheat or malfunction. If your air filter is clogged, it could be preventing the AC from turning on. Here’s how to check:
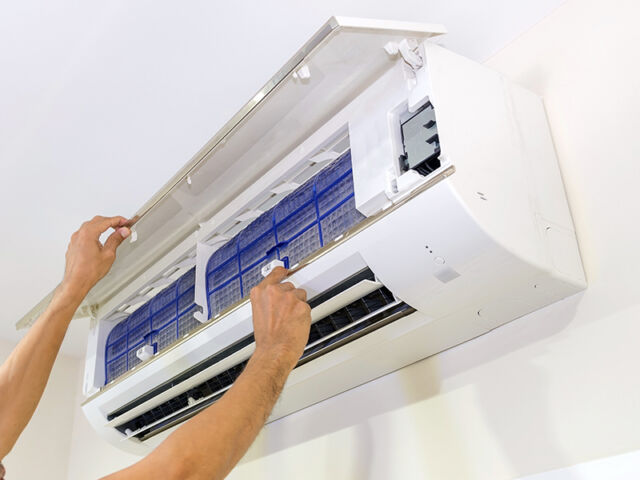
- Locate the Filter: Depending on your AC model, the air filter may be located behind a front panel or near the air intake. Consult your owner’s manual to locate it.
- Check for Dirt and Debris: Remove the filter and inspect it for dirt, dust, and debris. A dirty filter can significantly reduce airflow and impact the AC’s performance.
- Clean or Replace: If the filter looks dirty, try cleaning it with a vacuum cleaner or washing it under cool water. Be sure to allow it to dry completely before reinstalling it. If it’s too clogged or damaged to clean, replace it with a new one.
Step 4: Check the Condenser and Evaporator Coils
If the AC’s condenser or evaporator coils are dirty, the unit may fail to turn on or operate efficiently. Over time, dirt and debris can accumulate on these components, hindering heat exchange. Here’s what you can do:
- Condenser Coils: The condenser coils are located outside your home and are responsible for releasing the heat absorbed by the AC. If the coils are covered in dirt or leaves, it can obstruct airflow and cause the AC to overheat. Clean the coils with a soft brush or hose them down gently.
- Evaporator Coils: The evaporator coils are located inside the unit and absorb heat from the air. Over time, they can develop ice or frost buildup, especially if there is poor airflow or low refrigerant levels. If you notice ice on the coils, turn the AC off and let it thaw for several hours.
Step 5: Inspect the Drain Line
An air conditioner needs to drain moisture from the air to keep the system functioning properly. If the drain line is clogged, the AC may not turn on or may shut off after a short time.
- Clogged Drain Line: Over time, the drain line can become clogged with algae or debris, causing water to back up and trigger a safety switch to prevent damage. Inspect the drain line for any blockages, and if you find any, use a wet/dry vacuum to clear the line.
- Condensate Pump: If your system has a condensate pump, ensure that it is functioning properly. If the pump fails or becomes clogged, it can prevent the AC from turning on.
Step 6: Check for Refrigerant Leaks
Low refrigerant levels can prevent your AC from turning on or cause it to work inefficiently. If your air conditioner is low on refrigerant, it could be due to a leak in the system. This is a more complicated issue, and while you can inspect for visible signs of leaks (such as oil stains near the refrigerant lines), it’s best to leave refrigerant issues to a licensed HVAC professional. They can check for leaks, recharge the system, and ensure that the refrigerant levels are appropriate.
Step 7: Inspect the Capacitor and Contactor
The capacitor and contactor are critical components in the electrical system of your AC. If they malfunction, the unit may fail to turn on. These parts are located inside the unit’s electrical panel, and while inspecting them can be tricky, here’s what to look for:
- Capacitor: The capacitor stores energy to help start the motor. If the capacitor is faulty, the motor may not start, and the AC won’t turn on. If you hear a humming noise but the fan doesn’t spin, the capacitor may be to blame.
- Contactor: The contactor is a switch that allows electricity to flow to the compressor and fan. If the contactor is faulty, the AC may not power on. A defective contactor often needs to be replaced by a technician.
Step 8: Call a Professional HVAC Technician
If you’ve gone through all the troubleshooting steps above and your AC still refuses to turn on, it’s time to call in a professional HVAC technician. There could be an underlying issue, such as a malfunctioning compressor, wiring issues, or a failed motor, that requires professional attention.
Conclusion
When your air conditioner won’t turn on, the problem may be easier to fix than you think. By checking the power supply, thermostat settings, air filter, coils, and drain line, you can often identify and resolve the issue on your own. If all else fails, a professional HVAC technician can diagnose and repair any complex problems. Regular maintenance and timely troubleshooting can help extend the lifespan of your AC and ensure it works efficiently when you need it most.
Remember, safety should always be your top priority when working with electrical appliances. If you’re unsure about any of the troubleshooting steps or if you encounter electrical or refrigerant issues, don’t hesitate to contact a qualified professional for aircon servicing Ang Mo Kio to handle the repair.